Facing a 403 Forbidden error on WordPress site? it is one of the most critical errors that WordPress users can come across. This article will help you to solve this issue of 403 forbidden error.
Table of Contents
What is the 403 forbidden error in WordPress?
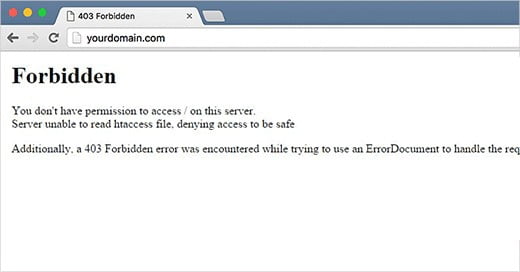
Have you seen any error message in WordPress telling you that something is Forbidden, or you don’t have permission to access this page? It is the 403 forbidden error in WordPress. It is possible that you are seeing this error due to a plugin, incorrect file permissions, or a corrupt .htaccess file. This 403 error occurs when server permissions don’t allow access to a specific page. Forbidden message on your screen like this:
Variations of 403 Forbidden Error
There are multiple variations for how this error code presents itself. Some of them are as below:
- Forbidden – You don’t have permission to access / on this server
- 403 – Forbidden: Access is denied
- Error 403 – Forbidden
- 403 Forbidden – Access to this resource on the server is denied
Now after understanding the 403 forbidden error let’s discuss its causes.
What are the causes of the 403 Forbidden Error in WordPress?
Following are the reasons for 403 forbidden error:
- Incorrect file or folder permissions
- Incorrect settings in the .htaccess file
Let’s see how quickly we can remove this error.
Note: Before doing anything keep a website backup so, if something goes wrong you can restore the website.
How to Fix 403 Forbidden Error in WordPress?
There are several methods to fix the 403 Forbidden error which are as following:
- Through plugins
- Fixing corrupt .htaccess file
- Changing your file permissions
1. Caused by a WordPress Plugin
The first thing you have to do is to deactivate all your WordPress plugins temporarily. It might possible that you have installed any security plugin on your site. If deactivating all plugins resolve your problem then it means one of your plugins is the reason for this 403 forbidden error. You can find the default plugin by deactivating one at a time.
2. Caused by the corrupt .htaccess File
Mostly 403 error occurs due to corrupt .htaccess file of your WordPress site. You can fix the issue by doing the following steps:
- Connect to your website using FTP client or file manager in cPanel.
- Find your .htaccess file in the root folder of the WordPress site.
- Download your .htaccess file to your computer for a backup.
- Delete that .htaccess file from your server.
- Try to access your website.
- Go to your wp-admin->Settings->Permalinks and just click on save changes button. This will create a fresh .htaccess file.
3. Caused by File Permissions in WordPress
All files on your website have file permissions. These permissions control who can access files and folders on your website. Incorrect permissions can be the cause of this error which makes your server think that you don’t have permission to access file or folder. If the above solutions don’t work for you try this one to resolve the issue of 403 forbidden error.
Ask your WordPress hosting provider to check your website for file permissions. They will fix that problem for you. You can change file permission by yourself too as follows:
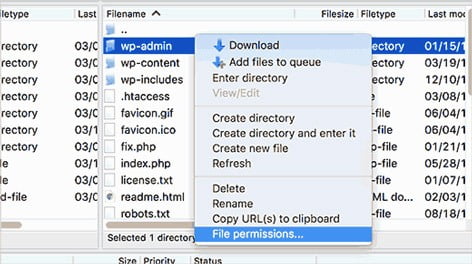
- Connect to your WordPress site using an FTP client.
- Open the root folder containing all your WordPress files.
- Select a folder, right-click on it and select file permissions.
- A File permission dialog box will open.
- Set your file permissions to the root folder to 744 or 755. Click the box next to ‘Recurse in subdirectories’ and then check the option ‘Apply to directories only’
- Click on ok button and FTP client will set the file permissions to all selected files
- Once you complete this step you need to do it for all other files. But this time you need to use the file permission of 644 or 640.
- Access your website.
We hope all the above solutions help you to resolve the issue of the 403 Forbidden error. If you have any queries about this article you may ask in the comments.
Thanks.